
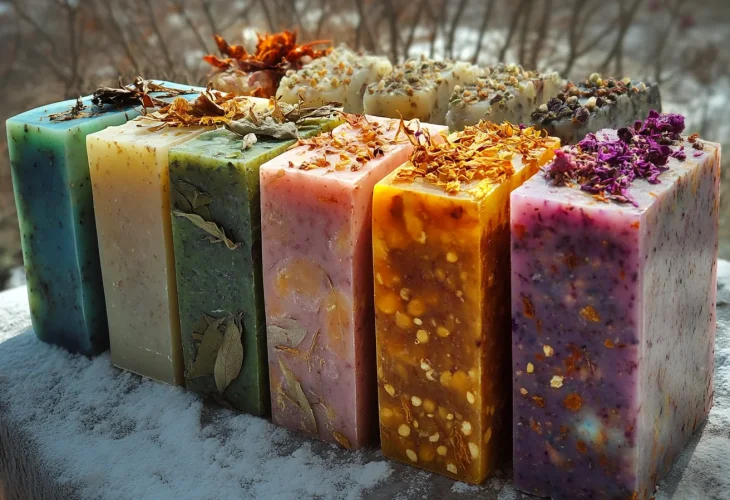
Workshop for Crafting Large, Scented Homemade Soaps
Looking for a creative, natural, and fragrant way to decorate your home? Making large soaps is the perfect solution! These soaps won't just add a wonderful aroma to your space; they'll also serve as an impressive design element on your living room shelf. In this workshop, we'll learn how to create uniquely designed large soaps with the perfect texture.
What Do You Need to Make Large Soaps?
Basic Ingredients:
- 1 kg glycerin soap base (clear or white)
- 3-5 tablespoons natural oils (such as coconut oil, almond oil, olive oil, or shea butter)
- 10-20 drops of your choice of essential oil (lavender, citrus, vanilla, eucalyptus, etc.)
- 1/2 cup goat milk, oat milk, or distilled water (optional, for creamy texture)
- Natural soap colors (optional, such as pink clay, turmeric powder, or activated charcoal)
- A handful of dried herbs (lavender, green tea leaves, rosemary, orange peels) or dried flowers
- Large silicone molds or wooden boxes lined with parchment paper
Required Equipment:
- Double boiler (or a pot with a heat-resistant glass bowl)
- Silicone or wooden mixing spoon
- Measuring tools
- Digital scale
- Soap cutting knife
- Plastic wrap or parchment paper (to preserve the soap after cutting)
Preparation Steps:
1. Preparing the Base
Cut the soap base into small cubes and place them in a double boiler for slow heating. Stir gently until the base is completely melted. Avoid overheating to retain the moisturizing properties of the soap.
2. Adding Nutrients and Scents
Once the base is melted, add the selected natural oils and essential oil. If using additives like goat milk or oat milk, add them at this stage, mixing gently.
3. Creating a Unique Design
If you want to incorporate different colors, divide the mixture into several bowls and add a different natural color to each. You can create colorful layers by pouring one layer, allowing partial cooling, then adding the next layer.
4. Adding Natural Texture
Before pouring, sprinkle dried herbs at the bottom of the mold to create a natural and elegant appearance. Then, carefully pour the soap mixture into the molds.
5. Cooling and Hardening
Let the soap cool at room temperature for about 24 hours. After that, release the soaps from the molds and let them harden for at least two weeks in a cool, ventilated place.
6. Cutting and Finishing
If the soap is in a large mold, use a sharp knife to cut it to the desired sizes. You can sand the edges for a smoother finish.
How to Display the Soaps in the Living Room?
- Place them on a wooden tray with scented candles.
- Arrange inside a wicker basket next to green plants.
- Wrap each soap in kraft paper with natural twine.
- Position transparent soap cubes in a large glass jar for an elegant display.
Additional Tips:
- Try combining several scents for a perfect harmony.
- You can add salt crystals or sugar to make a gentle exfoliating soap.
- Remember to specify the composition if you are giving them as a gift.
